Introduction
Do you love Windows 11 but want to try Linux for coding, privacy, or speed?
You don't have to pick one.
Dual booting lets you install two operating systems on the same computer. When you turn on your PC, a simple menu asks: Windows or Linux?
Many beginners worry this is dangerous. But if you follow these steps carefully, it is safe. You just need one hour, a USB drive, and a backup of your files.
By the end of this guide, you will switch between Windows 11 and Linux with one restart.
What Does Dual Booting Mean?
Dual booting means sharing your hard drive between two operating systems. Each system lives in its own separate space called a partition.
When you power on your computer, a bootloader (a small menu) asks which system to start.
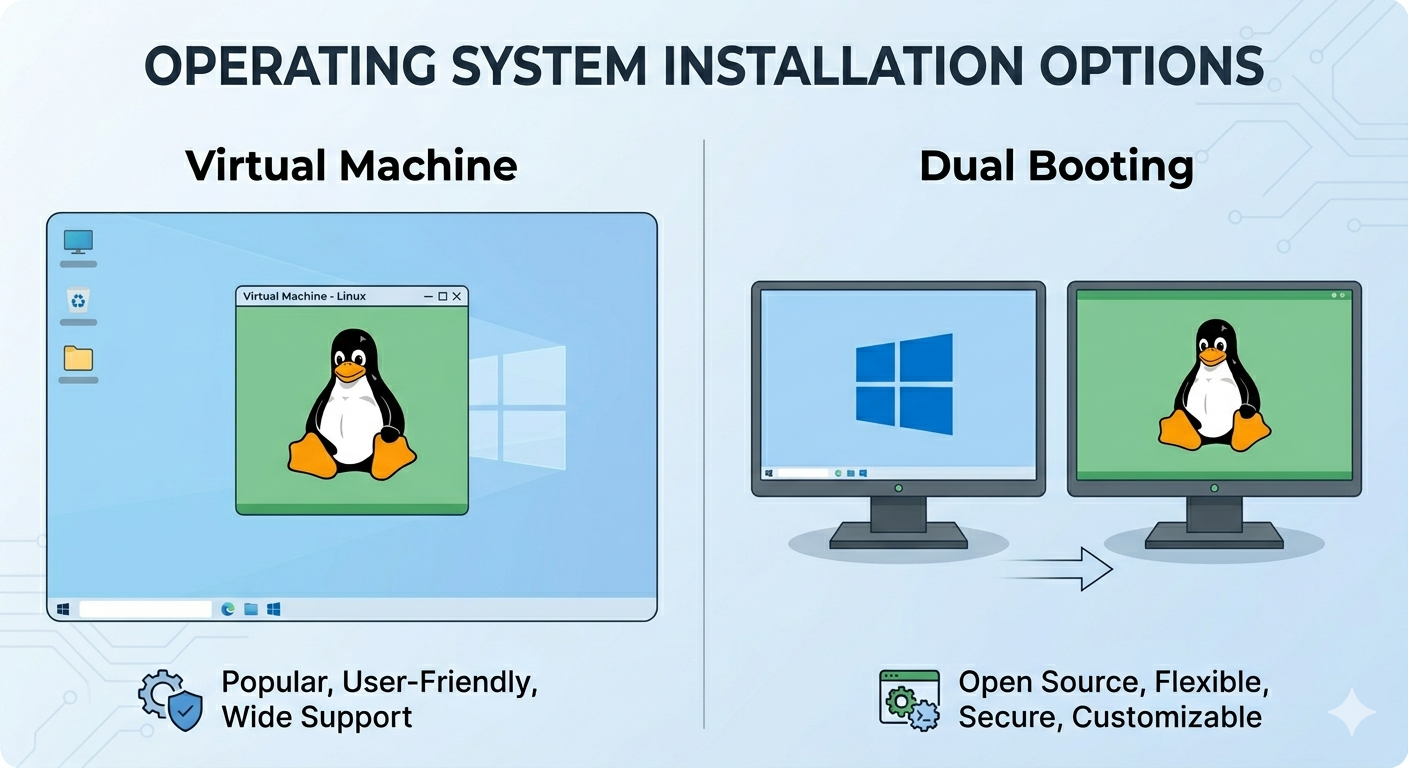
Dual Boot vs. Virtual Machine
| Feature | Dual Boot | Virtual Machine |
|---|---|---|
| Speed | Full speed | Slower |
| RAM usage | 100% available | Shared with Windows |
| Switching | Requires restart | Instant |
| Best for | Daily work, gaming, coding | Quick testing |
Verdict: For beginners who want to really use Linux, dual booting is better.
What You Need Before You Start
Gather these items first. Do not skip anything.
- A Windows 11 PC (plugged into power)
- One USB flash drive (8GB or 16GB minimum) — this will be erased
- A Linux ISO file (download link below)
- An external drive or cloud storage for backup
Which Linux Version Should a Beginner Choose?
Linux comes in different flavors called distributions (distros). For beginners, pick one of these:
| Distro | Best for |
|---|---|
| Ubuntu | Most popular, huge community help |
| Linux Mint | Looks like Windows, very easy |
| Pop!_OS | Good for gaming and newer hardware |
Our recommendation: Start with Ubuntu. It works on almost every computer.
Your Pre-Installation Checklist
- I backed up my important Windows files
- I have an empty 8GB+ USB drive
- My laptop is plugged into a charger
- I have 1 hour of free time
Back Up Your Windows 11 Files
Dual booting is safe, but accidents can happen. A power outage or a wrong click could erase your data.
How to Back Up (Two Easy Ways)
- Cloud method: Drag your important folders (Documents, Desktop, Pictures) into Google Drive, OneDrive, or Dropbox.
- External drive method: Copy and paste the same folders to a USB hard drive.
Disable Windows Fast Startup
Windows 11 has a feature called Fast Startup that can lock your hard drive. This prevents Linux from accessing your files later. Turn it off now.
How to Disable Fast Startup in Windows 11
- Open Control Panel (search for it in the Start menu)
- Click Power Options
- Click Choose what the power buttons do (left sidebar)
- Click Change settings that are currently unavailable
- Uncheck Turn on fast startup (recommended)
- Click Save changes
Why this matters: Fast Startup keeps your drive in a semi-hibernated state. Linux cannot safely open it. Disabling this avoids major headaches.
Create Space for Linux by Shrinking Your Drive
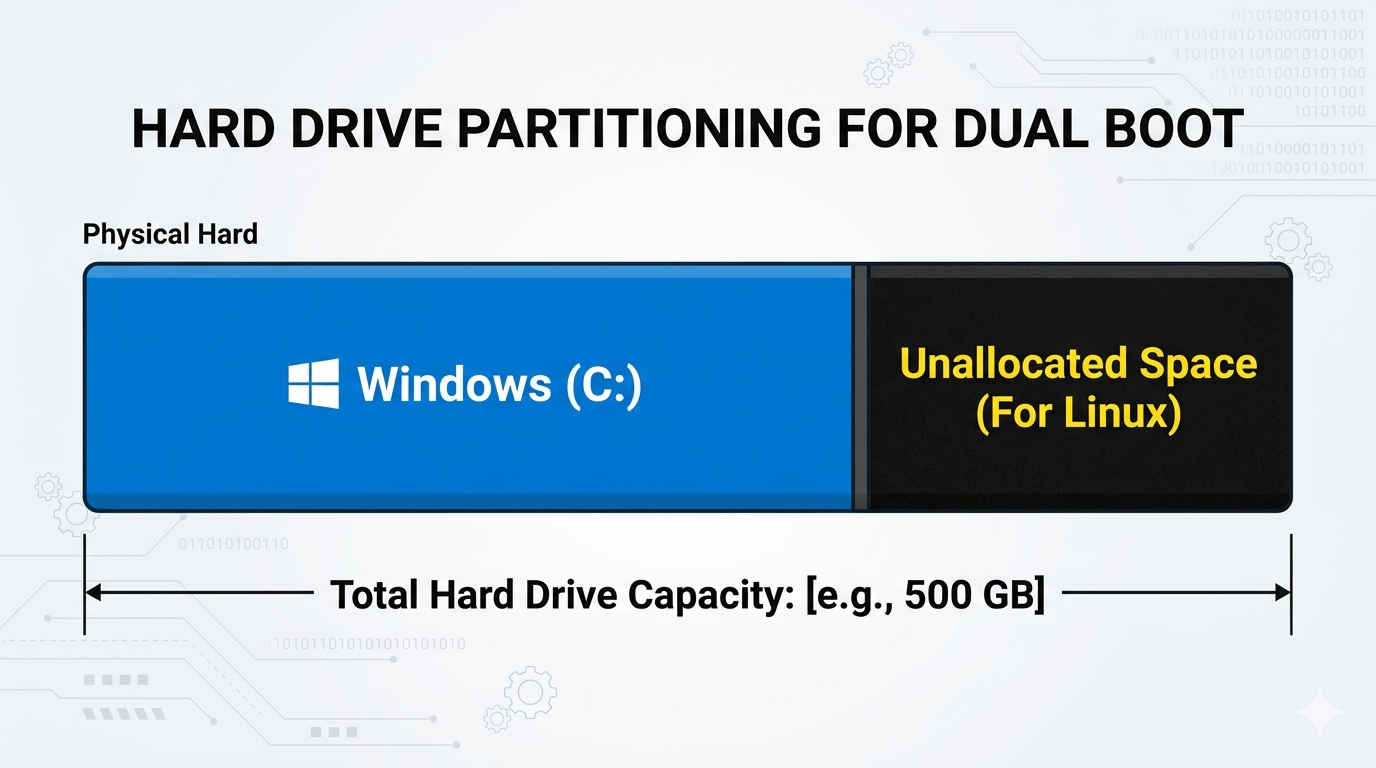
Right now, Windows 11 probably uses your entire hard drive. You need to shrink it to make room for Linux.
Think of your hard drive as a pizza. Right now, Windows has the whole pizza. You are going to cut one slice for Linux. You can use disk partition size calculator to gain insight on how much space to allocate for Linux.
How to Shrink Your Windows 11 Drive
- Right-click the Start button and select Disk Management
- Find your main drive (usually labeled
C:) - Right-click the
C:section and choose Shrink Volume -
Enter the amount of space to shrink:
- Minimum:
50000 MB(50 GB) - Recommended:
100000 MB(100 GB)
- Minimum:
- Click Shrink
When finished, you will see a black bar labeled Unallocated Space. This is your empty space for Linux. Do nothing else with it yet.
Create a Bootable USB Drive
You cannot install Linux by double-clicking a file. You need to turn your USB drive into a bootable installer.
Think of this USB as a "master key" that tells your computer to ignore Windows and run Linux instead.
How to Make a Bootable USB Using Rufus
- Plug in your USB drive
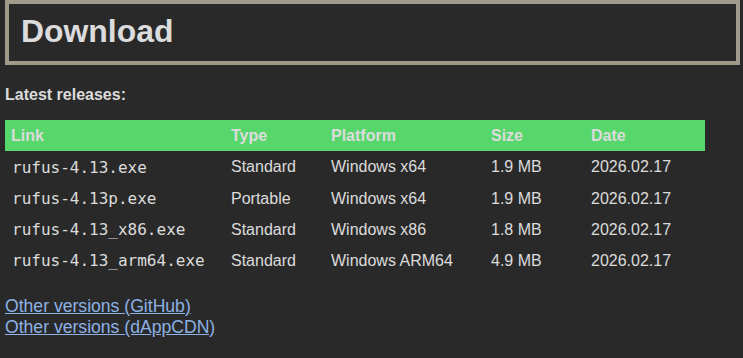
- Download Rufus from rufus.ie ↗ (it is free)
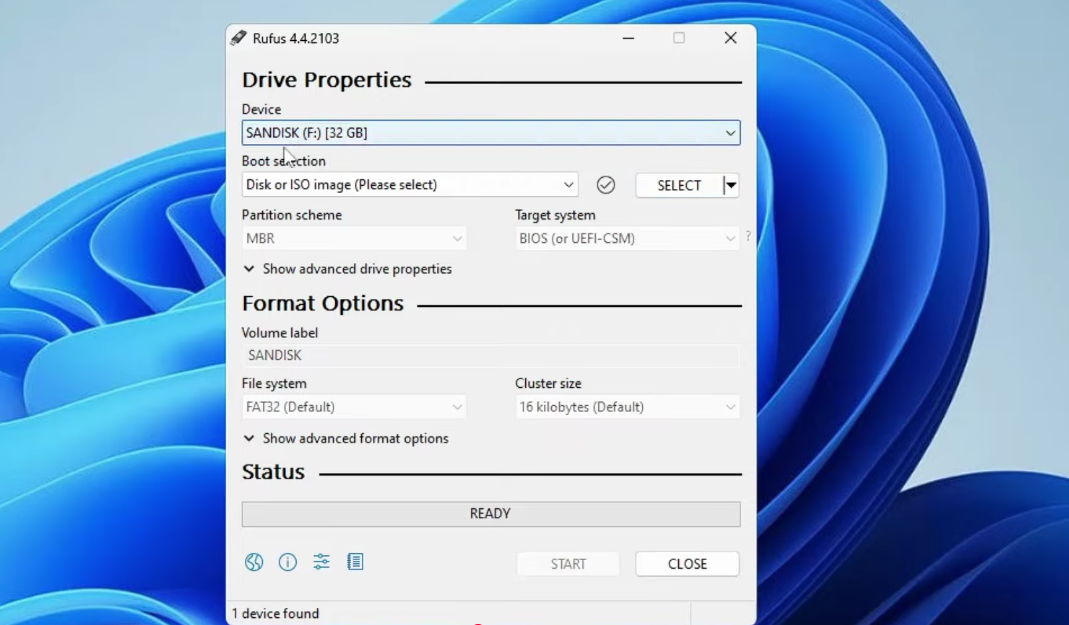
- Open Rufus
- Under Device, select your USB drive
- Click SELECT and choose your Linux ISO file (e.g.,
ubuntu-24.04-desktop-amd64.iso) - Leave all other settings as default
- Click START
- Click OK on any warning pop-ups
- Wait for the progress bar to reach 100% and say READY
Your bootable USB is done.
Boot From Your USB Drive
Now you need to tell your computer to start from the USB, not from Windows.
How to Access the Boot Menu
- Restart your computer with the USB still plugged in
- As soon as the screen goes black and lights up again, tap the boot key repeatedly (once per second)
- A menu appears. Use arrow keys to select your USB drive (look for
UEFI: USBor the brand name) -
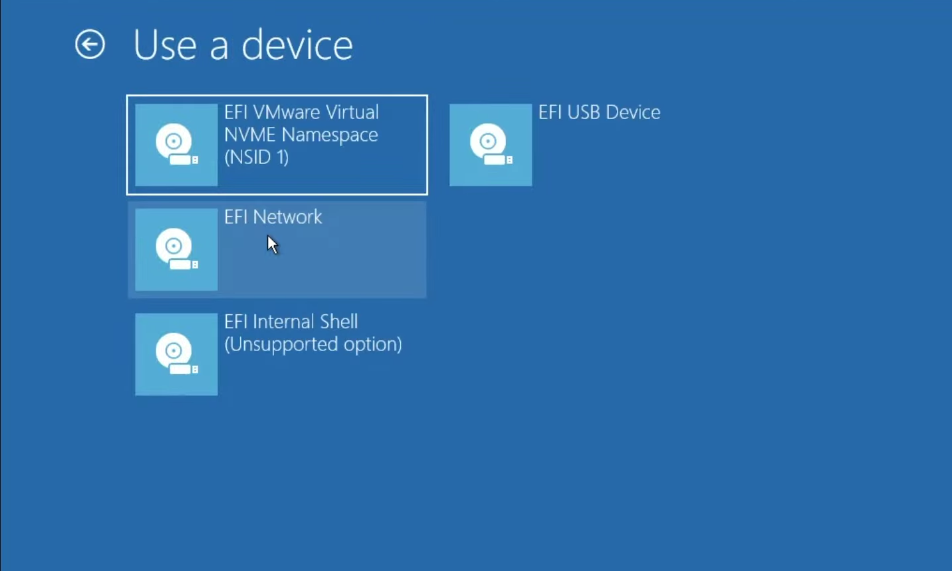
- Press Enter
Boot Keys by Brand
| Brand | Boot Menu Key |
|---|---|
| Dell, Lenovo, Acer | F12 |
| HP | F9 |
| ASUS | F2 or DEL |
| Microsoft Surface | Volume Down button |
Install Linux Alongside Windows 11
Once you boot from the USB, you will see a welcome screen.
First Steps
- Choose your language and keyboard layout
- Connect to Wi-Fi (if available)
- Check the box: Install third-party software for graphics and Wi-Fi
- Click Continue
The Most Important Screen: Installation Type
You will see three options. Choose carefully.
| Option | What it does | Choose? |
|---|---|---|
| Install Linux alongside Windows Boot Manager | Keeps Windows and adds Linux | ✅ YES |
| Erase disk and install Linux | Deletes Windows completely | ❌ NO |
| Something else | Manual partitioning (experts only) | ❌ NO |
Select Install Linux alongside Windows Boot Manager.
The installer will automatically find the Unallocated Space you created earlier.
Create Your User Account
- Your name: Enter your real name
- Computer name: A short name for your PC
- Username: A single word (lowercase)
- Password: Choose something memorable
Click Continue. The installation takes 10 to 20 minutes.
Restart and Meet the GRUB Menu
When installation finishes, click Restart Now. Remove the USB drive when prompted.
Your computer will restart and show a new screen called the GRUB menu.
What You See in GRUB
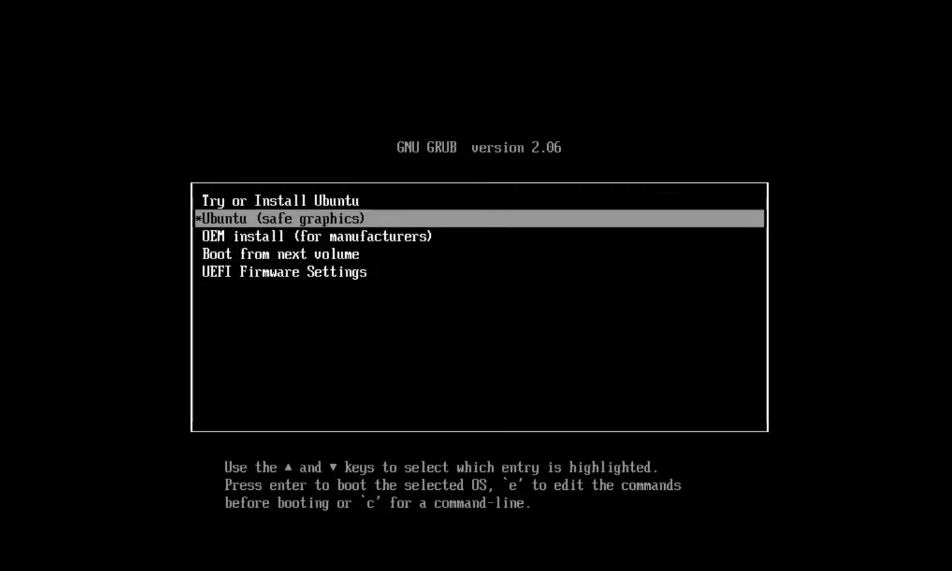
- Ubuntu (or Linux Mint) — Starts your new Linux system
- Advanced options for Ubuntu — Ignore this for now
- Windows Boot Manager — Starts Windows 11
Use arrow keys to choose. Press Enter to start. If you do nothing for 10 seconds, the computer will start the top option (usually Linux).
Video Tutorial
Disable Secure Boot (If Needed)
If your computer still ignores the USB or your Wi-Fi does not work after installing Linux, disable Secure Boot.
How to Disable Secure Boot
- Go to Settings > System > Recovery in Windows 11
- Next to Advanced Startup, click Restart Now
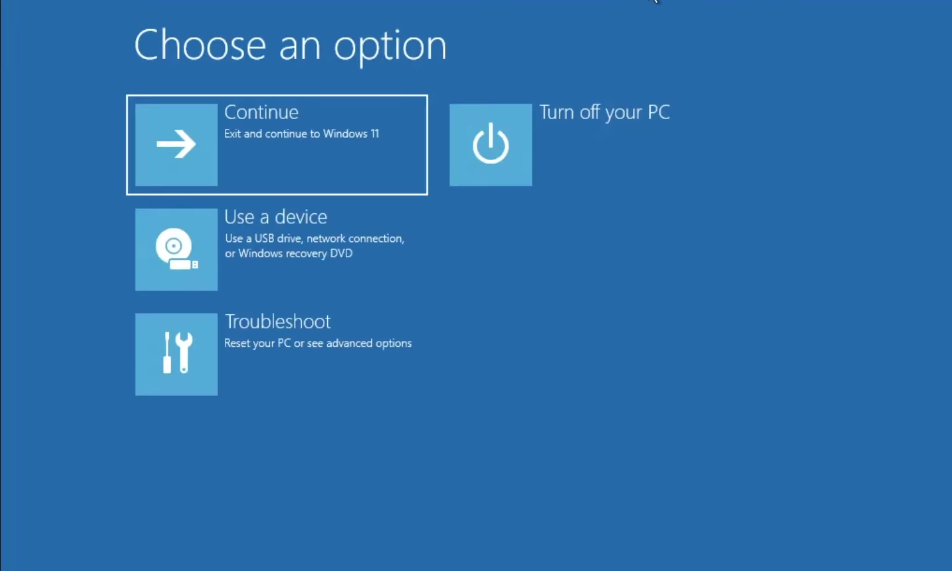
- When the blue menu appears, select Troubleshoot > Advanced Options > UEFI Firmware Settings
- Click Restart
- Inside the BIOS menu, find the Boot or Security tab
- Locate Secure Boot and set it to Disabled
- Press F10 to save and exit
Most modern Linux distros work with Secure Boot on. Only disable it if you have problems.
Pro Tips for Your Dual Boot Life
Use Each System for What It Does Best
| Task | Use |
|---|---|
| Gaming, Adobe, Microsoft Office | Windows 11 |
| Coding, privacy, learning Linux | Linux |
Share Files Between Both Systems
Linux can read your Windows files. Open the Linux file manager and look for Other Locations > Windows Drive.
For files you need in both systems: Save them to a cloud service like Google Drive or Dropbox.
Keep Both Systems Updated
- Linux updates: Improve security and battery life
- Windows updates: Finish them completely before switching to Linux
Frequently Asked Questions
Does dual booting slow down my computer?
No. Only one system runs at a time. Both run at full speed. The only cost is storage space.
Can I remove Linux later?
Yes. Open Disk Management in Windows, delete the Linux partitions, then run a Windows Startup Repair to remove the GRUB menu.
Can Windows read my Linux files?
Not easily. Linux uses a different file system (Ext4). Use a cloud drive or a shared USB drive to move files between them.
Do I need to disable Secure Boot for Linux?
Most modern distros work with Secure Boot on. Only disable it if your USB won't boot or your Wi-Fi doesn't work after installation.
What if I forget my Linux password?
You can reset it from the GRUB menu. Search online for "reset Ubuntu password from recovery mode."
Conclusion
You did it.
You backed up your files, disabled Fast Startup, shrunk your Windows drive, created a bootable USB, and installed Linux alongside Windows 11.
Now every time you turn on your computer, you have a choice. Windows for gaming and work. Linux for coding, privacy, and exploration.
Your first mission: Boot into Linux, open the Terminal, and type:
Press Enter. You will see a cool summary of your new system. Welcome to the world of Linux. Happy exploring.